Twilio + Cloudonix + Retell Integration
The Use Case
Twilio is a global commmunications platform, adopted by multiple industries as a go-to solution for phone numbers and call-minutes on a global scale. Retell is a voice agent orchestration platform, providing businesses with a simple interface for creating and managing AI agents, specifically voice agents.
Traditionally, Retell and Twilio have direct integration, however, this integration can be extended by introducing Cloudonix to the integration, and thus, expose new capabilities.
This tutorial will guide you through the process of integration Twilio, Cloudonnix and Retell—and then, introduce you to some advanced use-cases.
The following tutorial is a step-by-step walk through integrating Twilio, Cloudonix, and Retell. To complete this tutorial, you'll need to have a Twilio account, a Cloudonix account, and a Retell account.
For sake of simplicity, this tutorial will assume the usage of the Cloudonix domain named: ama-2bpsmp.cloudonix.net.
Connecting Twilio to Cloudonix
1. Cloudonix Inbound SIP Hostname
- Log into your Cloudonix account and select your desired Cloudonix domain.
- Select the Inbound Trunks menu option, the following screen will appear:
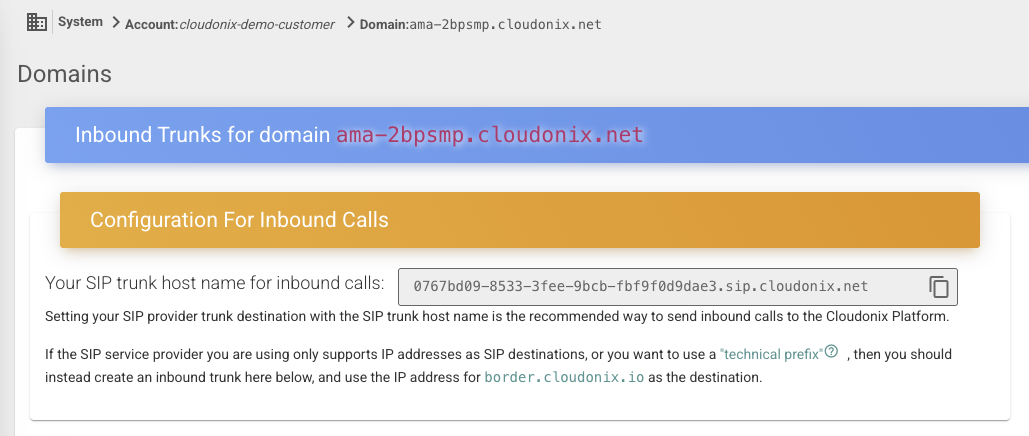
Pay attnetion to the Configuration For Inbound Calls section, which details a specially formulated hostname. In Cloudonix
speak, we call this the Inbound SIP Hostname. This hostname is visible only the domain manager, and it is not publicly visible.
You will use this hostname in later parts of this tutorial.
2. Twilio Elastic SIP Trunk
- Log into your Twilio account and navigate to the Elastic SIP Trunking menu.
- From the Elastic SIP Trunking menu, select the Trunks option, the following screen will appear:
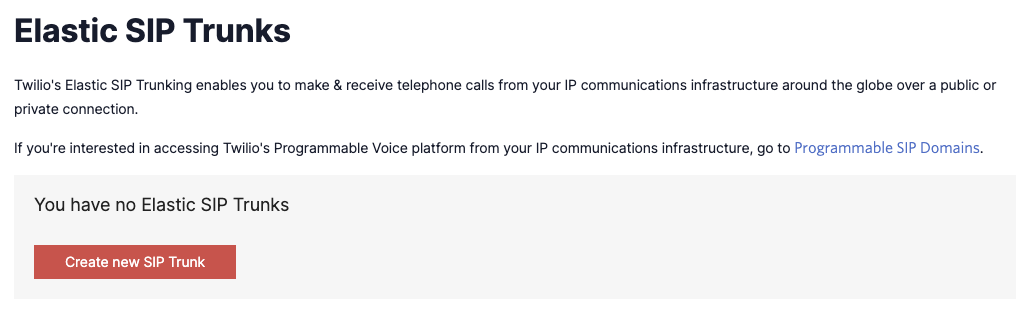
- Click the Create new SIP Trunk button, the following screen will appear:
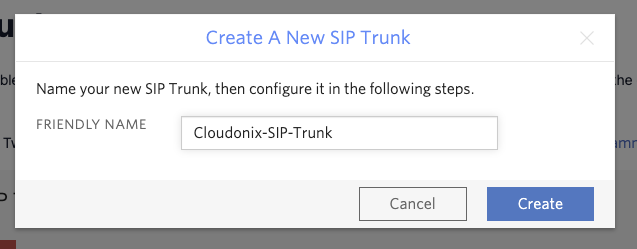
Provide a unique name for your SIP Trunk, you will need to remember it later on. Once you entered a name for your trunk, click the Create button to continue. The screen will display some general information, you can disregard it for now.
Call Termination Endpoint (Cloudonix -> Twilio)
- Click the Termination menu option, the following screen will appear:
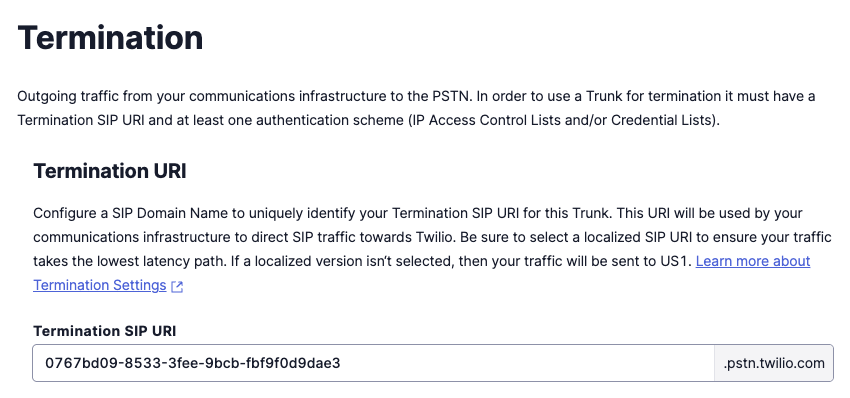
In the Termination SIP URI field, enter the first part of your Cloudonix Inbound SIP Hostname. For example, in our
example, the Cloudonix Inbound SIP Hostname is 0767bd09-8533-3fee-9bcb-fbf9f0d9dae3.sip.cloudonix.net, the first part
of the URI would be 0767bd09-8533-3fee-9bcb-fbf9f0d9dae3. Then, click the Save button to save your configuration.
The above naming convention is only a recommendation, you may use any other naming convention of your choice.
Scroll down to the Authentication section, as shown below:
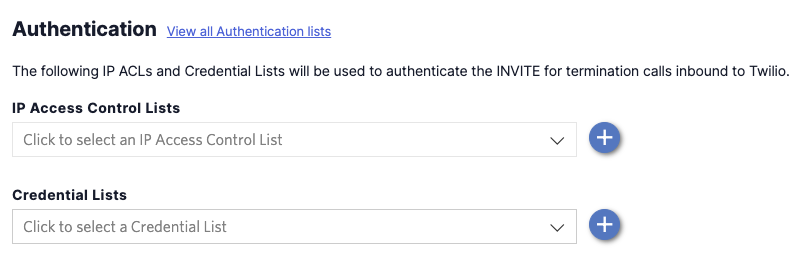
Click the PLUS, located to the left of the IP Access Control Lists option, the following screen will appear:
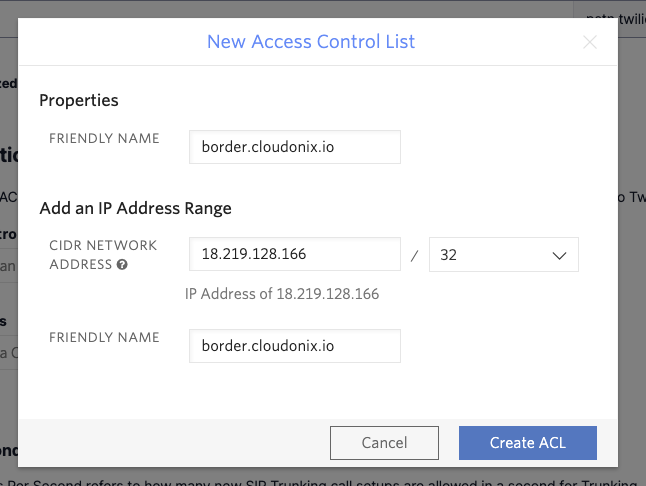
Fill the information as shown above, and click the Create ACL button to save your configuration. After saving your configuration, the Authentication section should look like this:
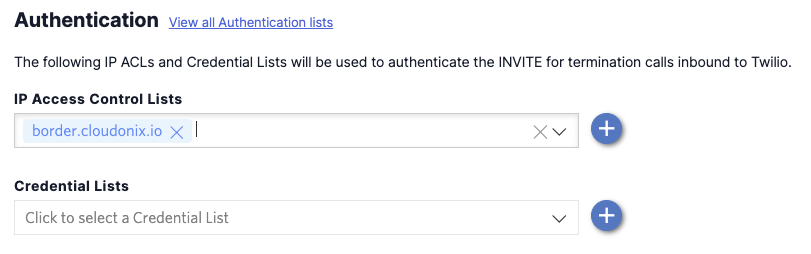
- Click the Save button to save your configuration.
Call Origination Endpoint (Twilio -> Cloudonix)
- Click the Origination menu option, the following screen will appear:
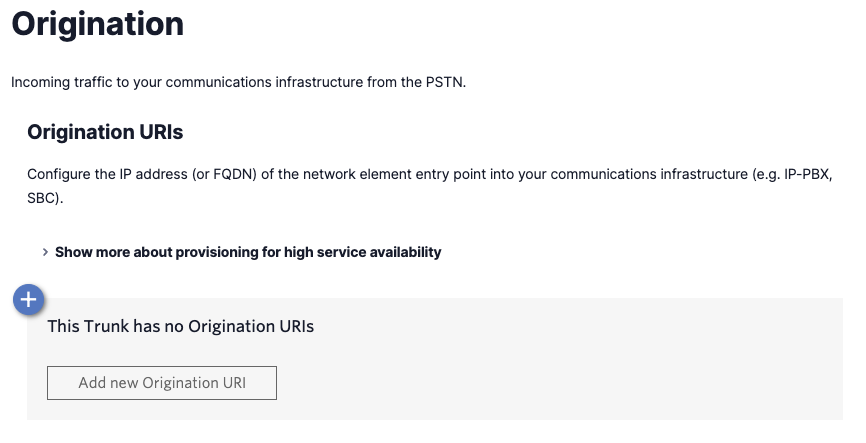
- Click the PLUS button to create a new
Origination URIendpoint. The following screen will appear:

Pay attention to the SIP URI field, here you will need to paste your Clopudonix Inbound SIP Hostname, as a valid SIP URI.
For example, in our case, the Origination SIP URI would be sip:0767bd09-8533-3fee-9bcb-fbf9f0d9dae3.sip.cloudonix.net.
-
Click the Add button to save your configuration.
-
Click the Numbers menu option, to purchase a new number and assign it to your newly created
Elastic SIP Trunk.