Twilio Integration
Twilio is a cloud communications platform that enables businesses and developers to build communications capabilities into their applications. It provides APIs (Application Programming Interfaces) that allow developers to add features like voice, video, messaging, and authentication to their applications. Essentially, Twilio is a platform-as-a-service (PaaS) that provides the infrastructure for building communication-rich applications.
You can integrate Twilio with Cloudonix, enabling inbound and outbound calling to/from your Cloudonix voice applications.
In the world of VoIP, the term Termination is normally associated with outbound calling, while Origination is associated
with inbound calling. However, Twilio's platform takes itself as the point-of-reference, and thus, the terms are used to
associate in reverse. Termination means - terminating calls on to the Twilio network, while Origination means - originating
outbound calls from Twilio.
Before we begin
Before we begin, you will need to retrieve your Cloudonix domain inbound calls host name (aka: inbound domain alias). This can be retrieved from your Cloudonix account dashboard, under the Inbound Trunks section.
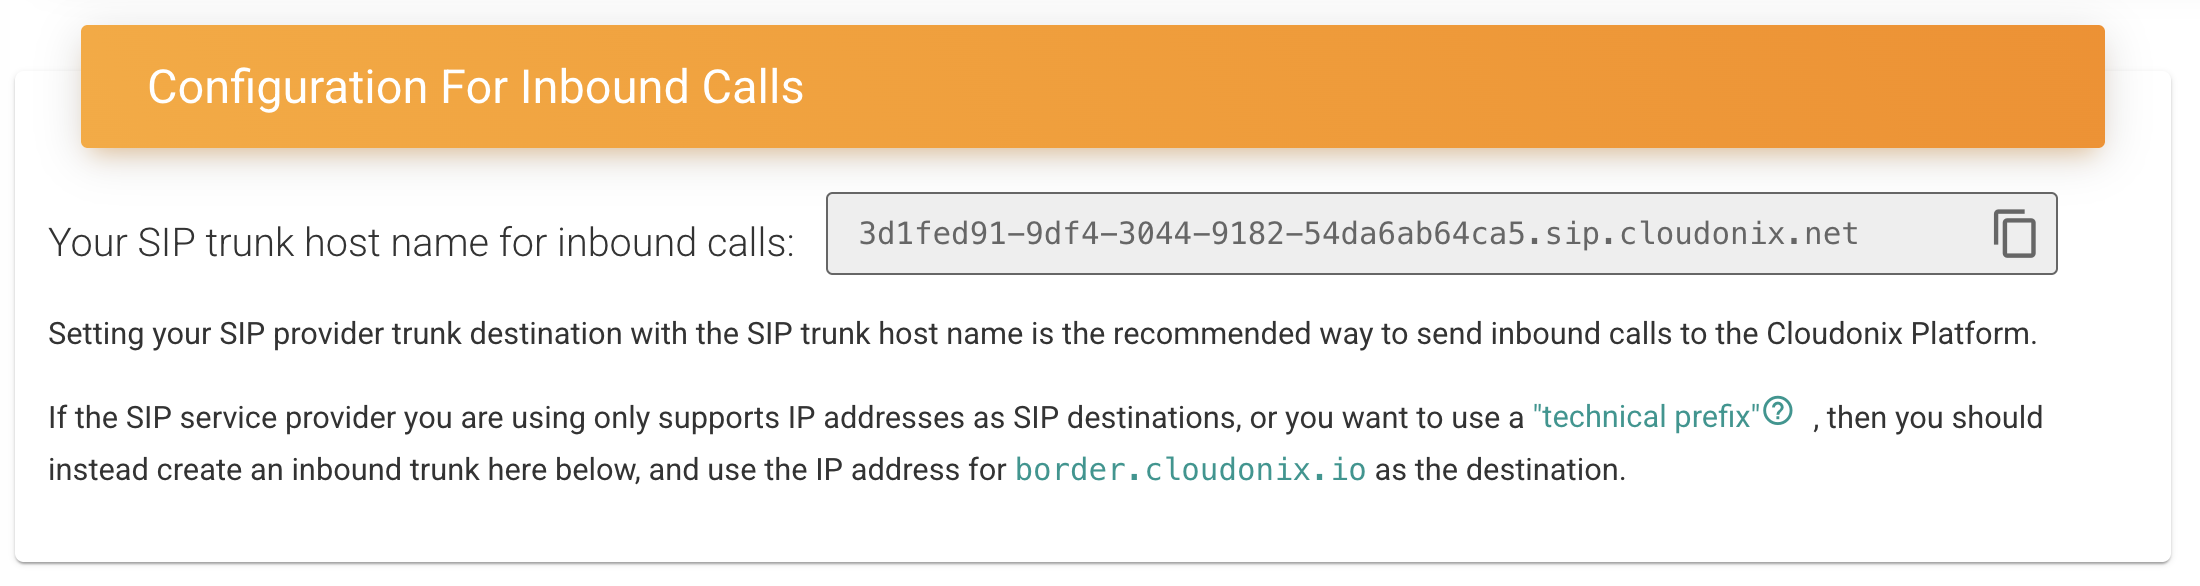
Make sure to have your inbound calls hostname available throughout this process, as we will use it (or parts of it).
Technically speaking, Cloudonix will accept inbound calls from any IP number in the world, as long as the hostname matches as existing Cloudonix inbound trunk hostname alias. Inbound hostname aliases are built from random UUID identifiers, and are not stored within the Cloudonix domain zone - thus, they are impossible to guess or predict.
Additional security measures can be added to your Voice Applications, to be processed upon receiving a new inbound call.
Twilio Setup
Log in to your Twilio account and follow the steps below, to configure your inbound/outbound trunks. This guide assumes that you already have a Twilio account, with sufficient credit.
Twilio offers two variants of SIP trunking capabilities: BYOC Trunks and Elastic SIP Trunking. We will explain both SIP trunking procedures, however pay attention below for the intended use of each SIP trunking option.
BYOC Trunk vs. Elastic SIP Trunk
BYOC Trunking and Elastic SIP Trunking may sound similar, but they are designed for two different use cases. The following table illustrates these differences:
| Feature | BYOC Trunk | Elastic SIP Trunk |
|---|---|---|
| Carrier Control | Use your existing PSTN carrier | Twilio manages the SIP trunking service |
| Number Management | Use your existing phone number inventory | Twilio manages number assignment |
| Integration | Integrates with existing PSTN carrier infrastructure | Provides a managed SIP trunking service |
| Scalability | Requires coordination with your carrier for scaling | Elastic capacity for call concurrency |
| Redundancy | Depends on your carrier's network and Twilio's BYOC features | Leverages Twilio's Super Network for redundancy and reliability |
For all practical matters, when using with Cloudonix, Elastic SIP Trunking is the preferred method. However, if you have pre-existing applications working on Twilio, BYOC Trunking is the recommended method.
Elastic SIP Trunking (Preferred)
Twilio Elastic SIP Trunking is a cloud-based solution that connects your IP-based communication infrastructure to the Public Switched Telephone Network (PSTN), allowing you to make and receive phone calls over a broadband internet connection. It's essentially a way to use your existing PBX or VoIP system to connect to traditional phone lines without needing to manage a complex network of physical phone lines.
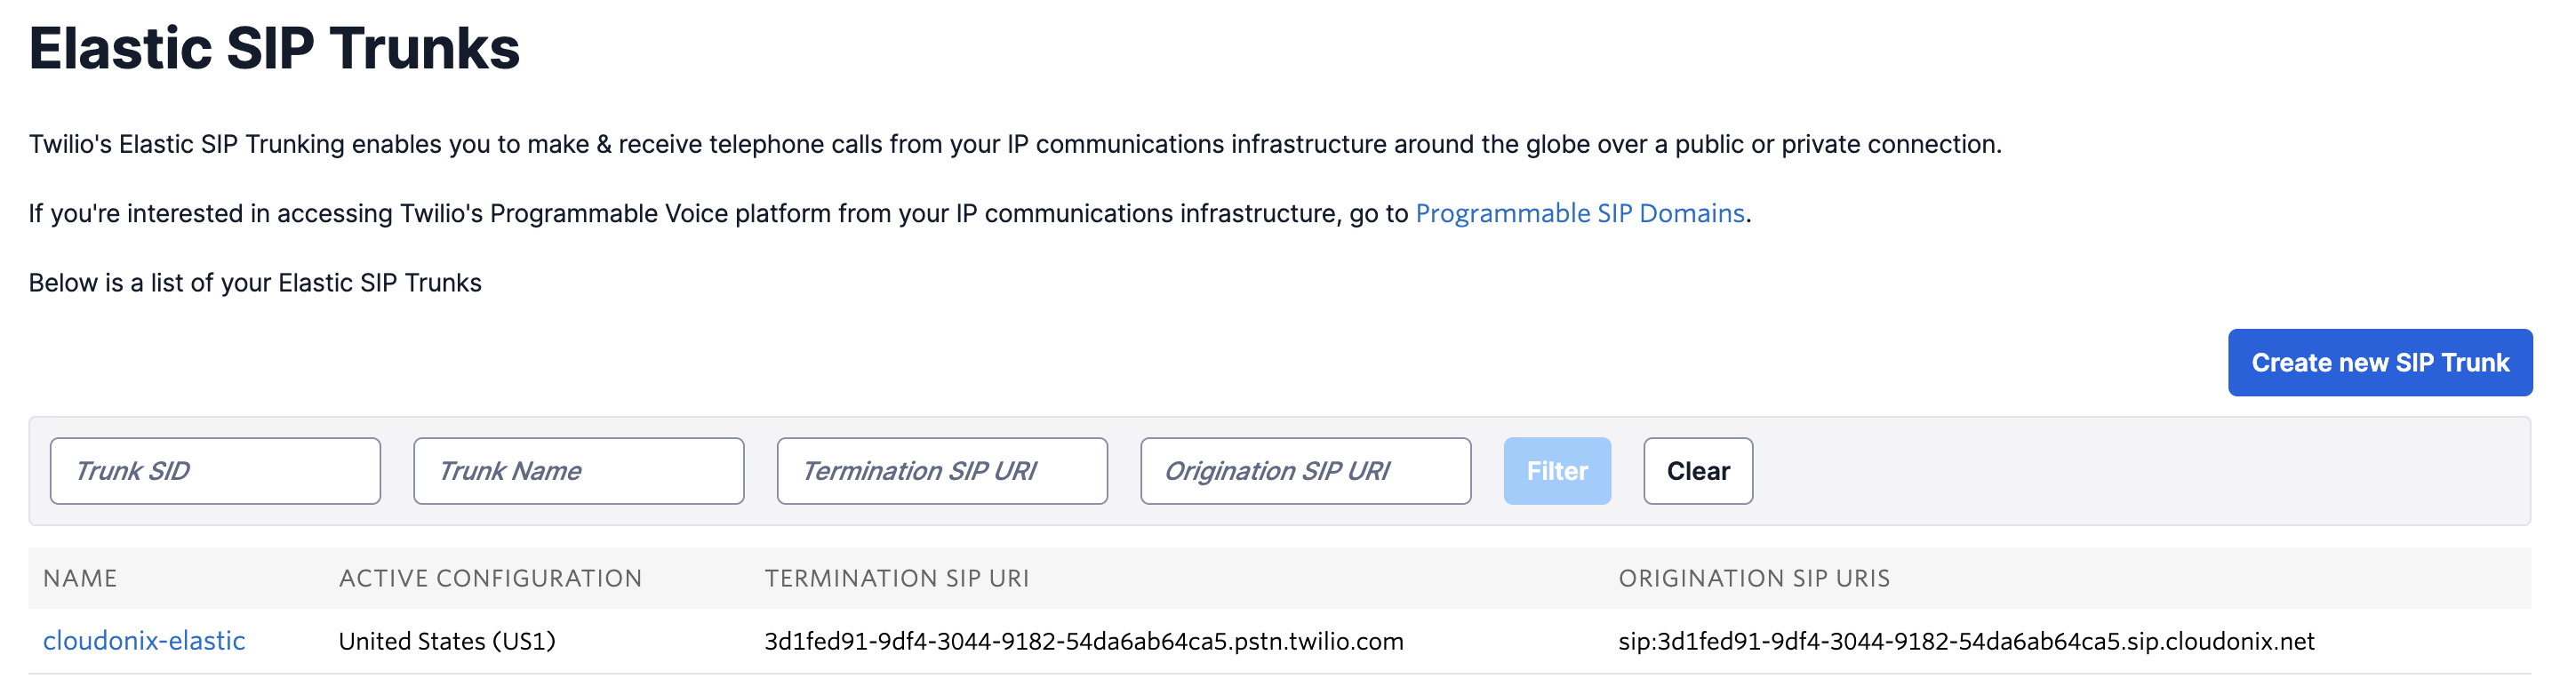
Logon to your Twilio dashboard, then from the left menu select Elastic SIP Trunking -> Manage -> Trunks. The following screen will appear:
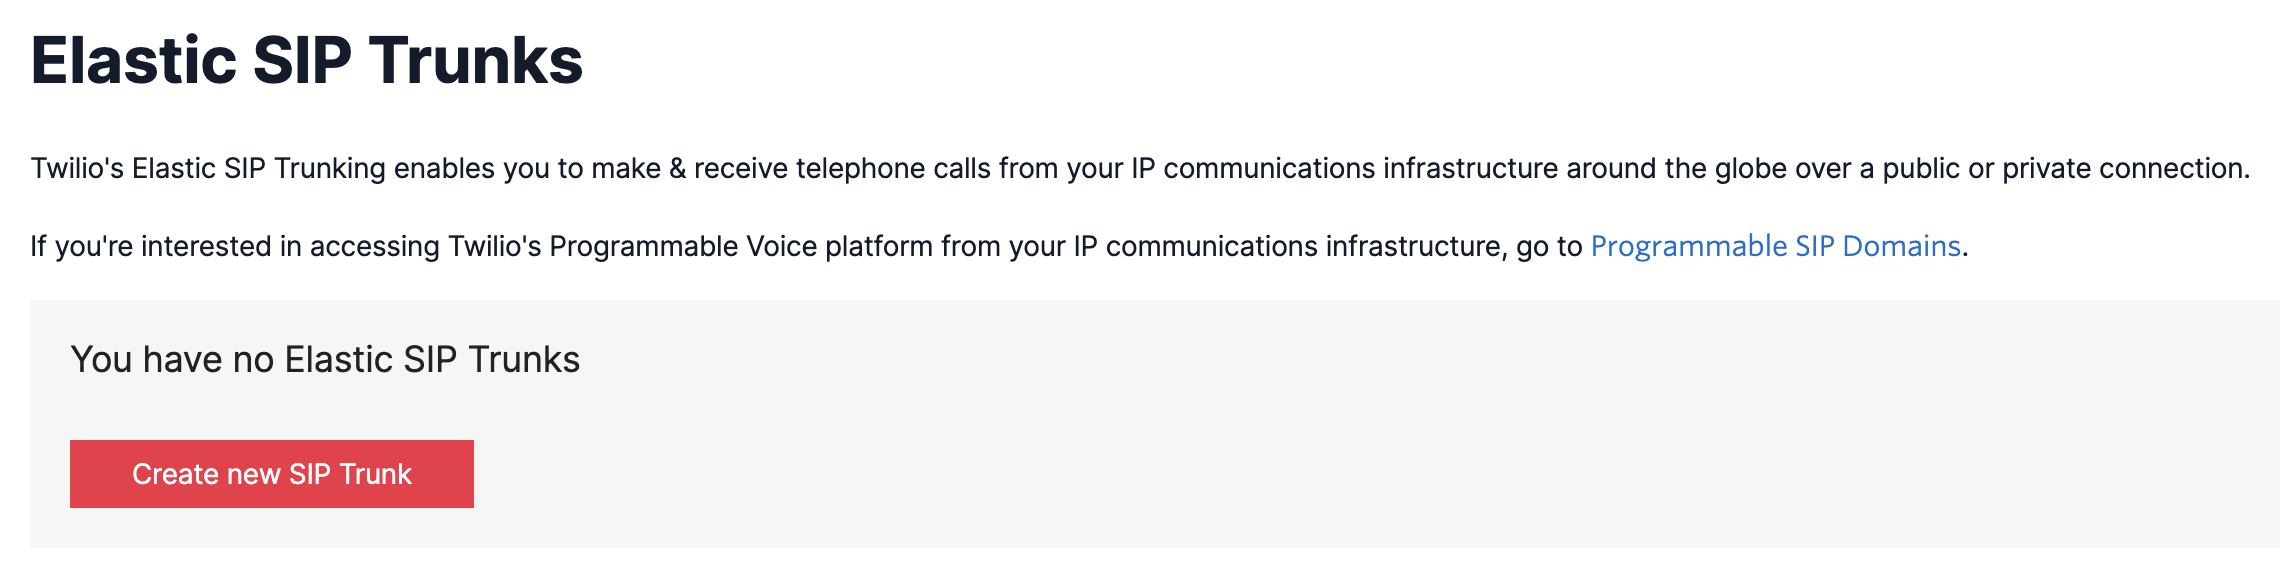
Click the Red Create new SIP Trunk button to create a new Elastic SIP Trunk, the following will appear:
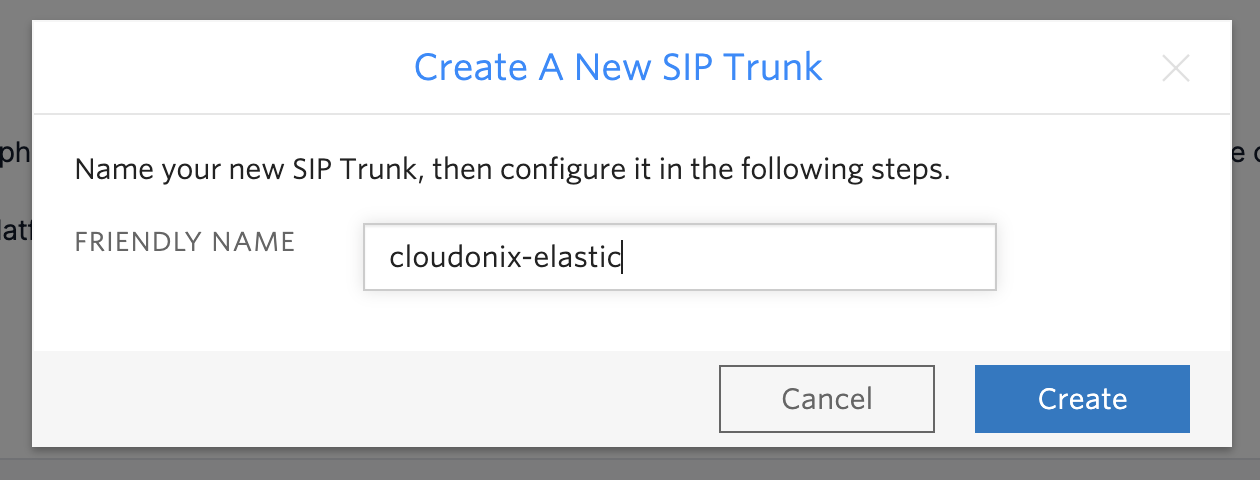
Give your new trunk a meaningful name and click Create. Now, from the left menu, select the Termination option. In
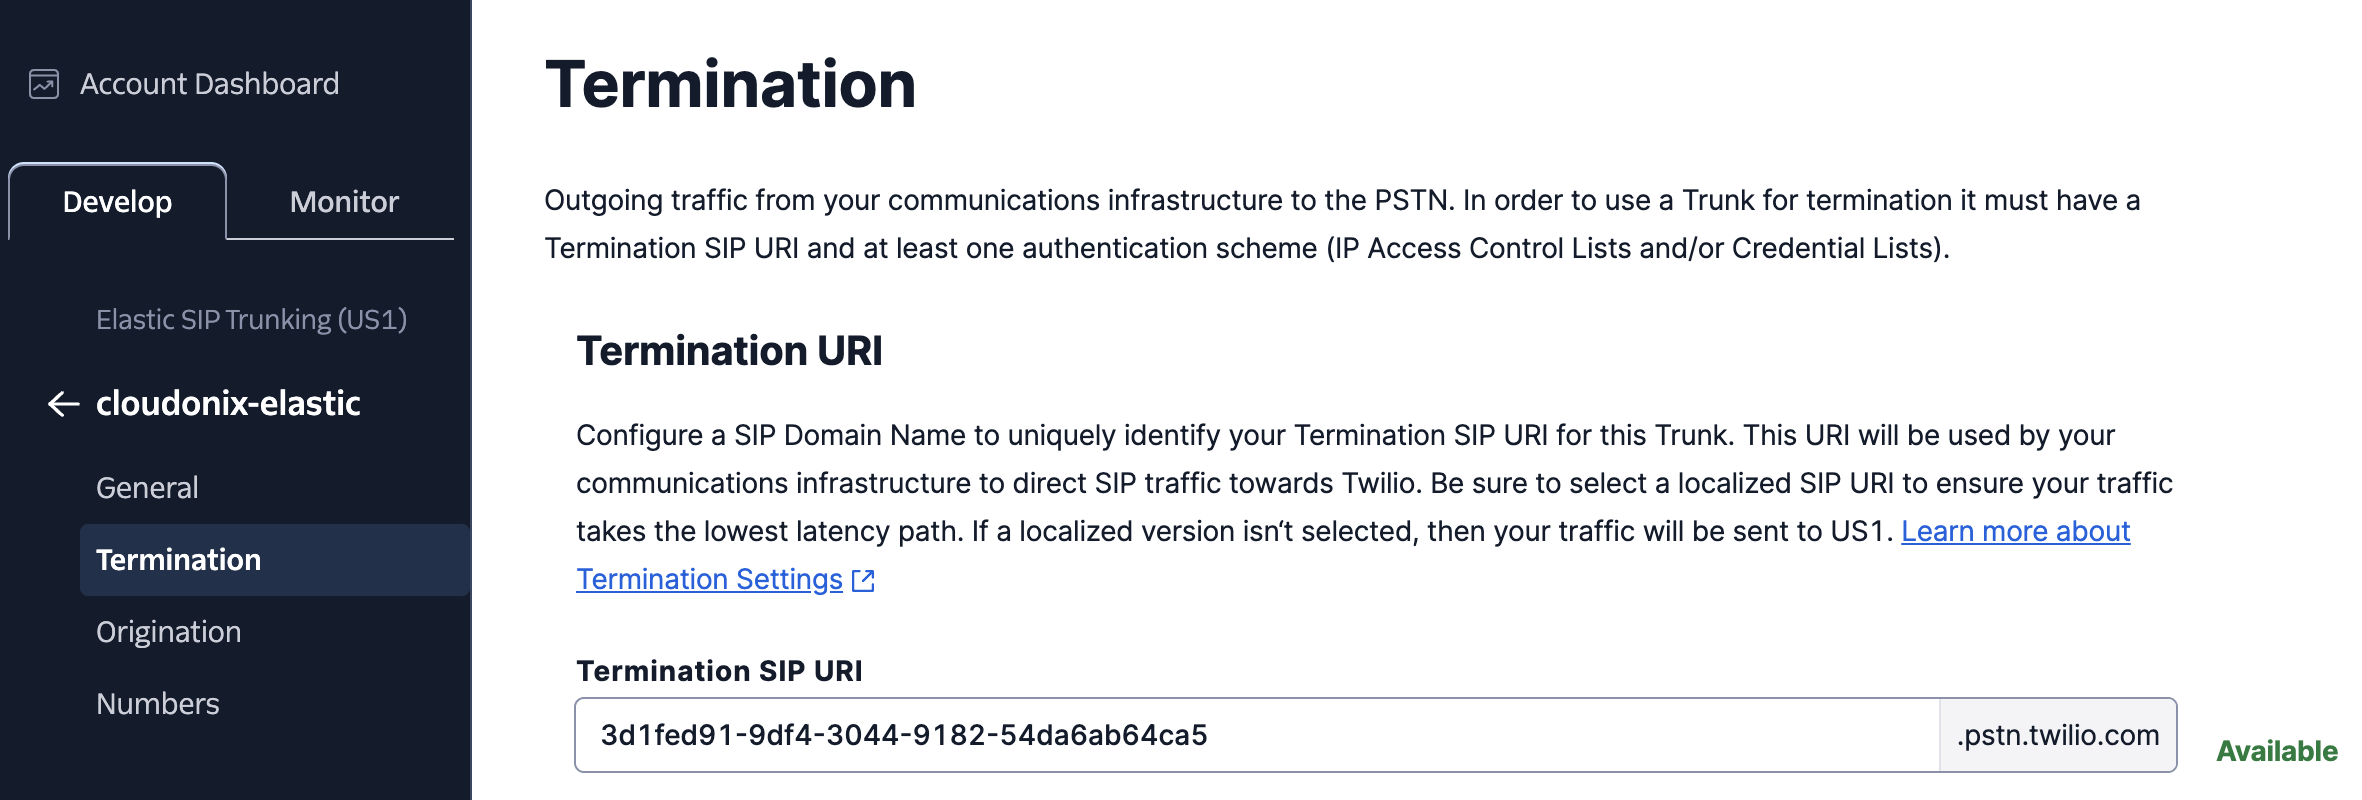
In the field called Termination SIP URI insert your Cloudonix inbound calls host. For example, if your inbound calls
hostname is: 3d1fed91-9df4-3044-9182-54da6ab64ca5.sip.cloudonix.net use 3d1fed91-9df4-3044-9182-54da6ab64ca5 as
your Termination SIP URI for sake of simplicity and completeness and click Save.
Next, select the Origination option from the left menu, the following sceen will appear:
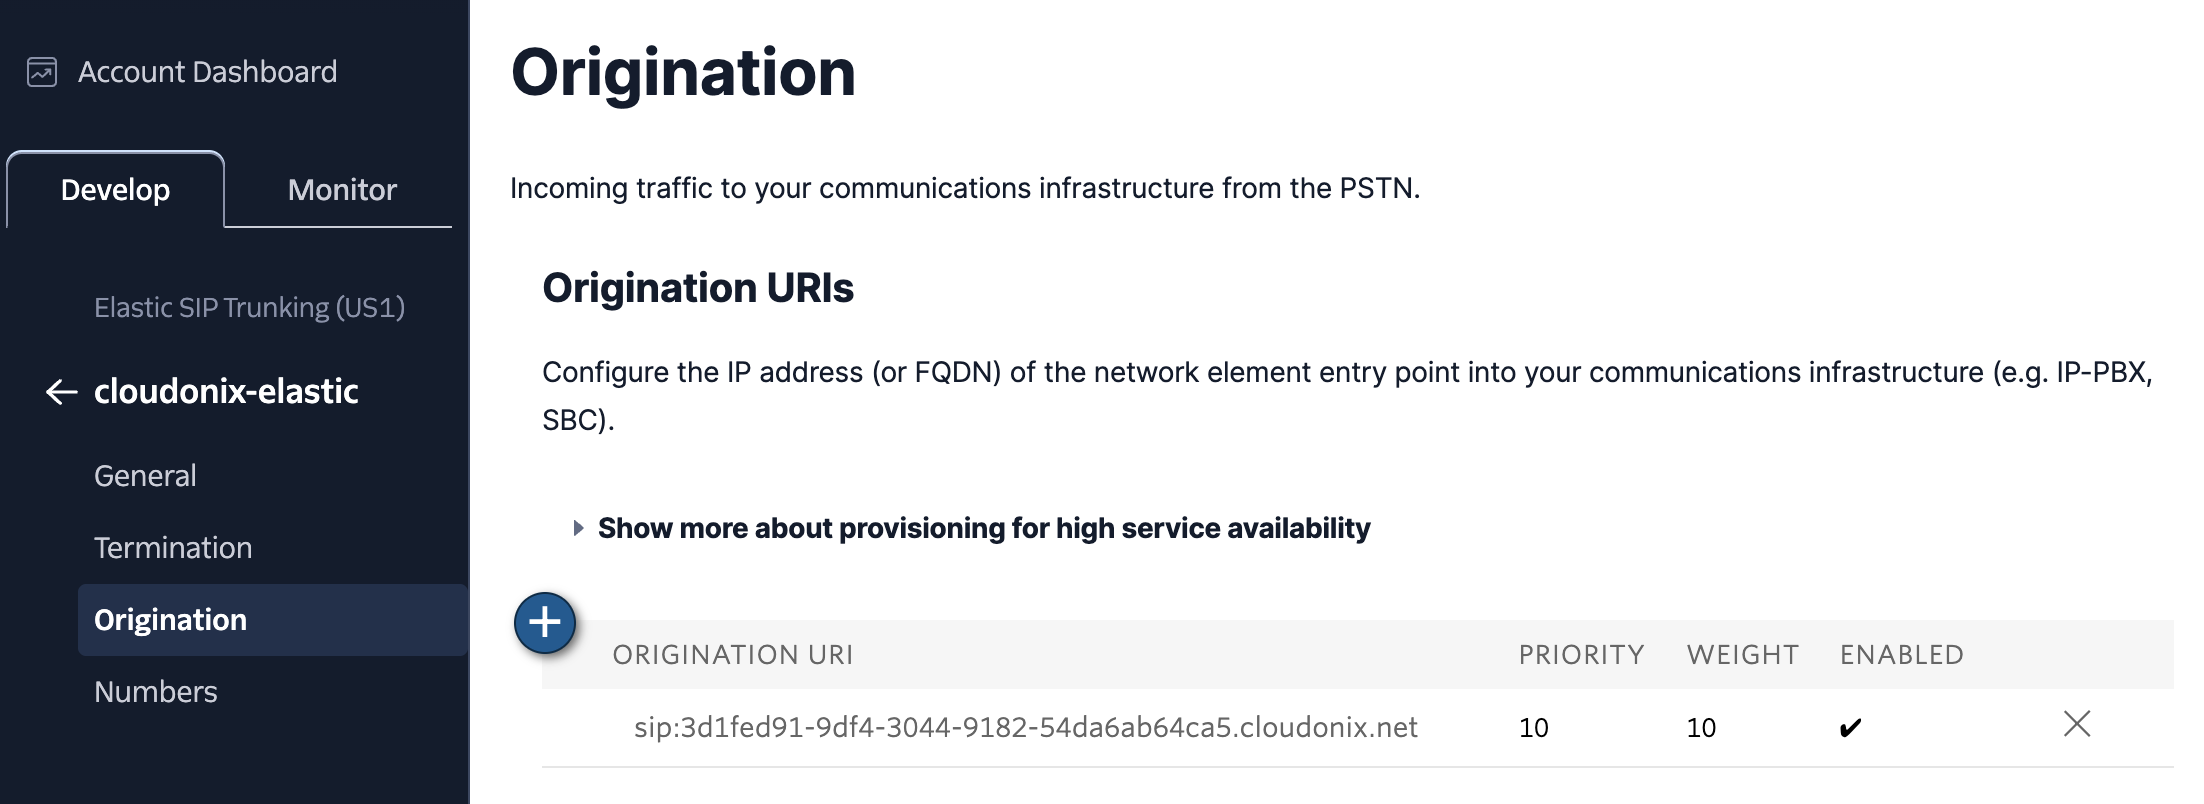
Then click the blue plus button to create your origination endpoint:
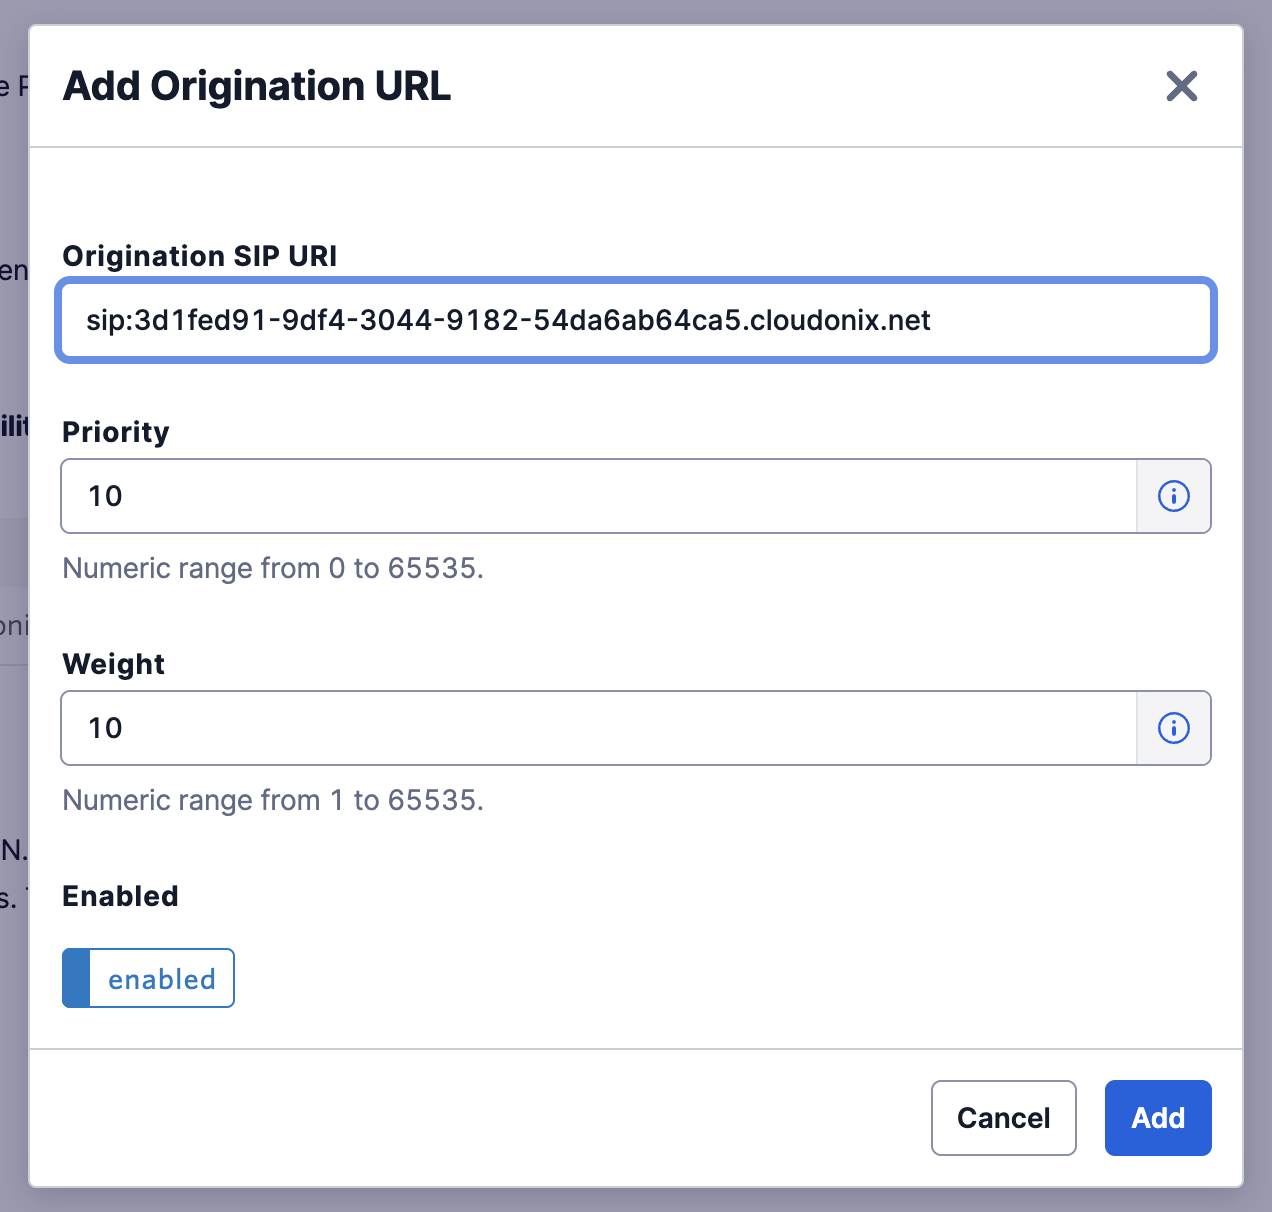
In the Origination SIP URI enter your inbound calls hostname, prefixed with sip:. For example, if your inbound calls
hostname is: 3d1fed91-9df4-3044-9182-54da6ab64ca5.sip.cloudonix.net use sip:3d1fed91-9df4-3044-9182-54da6ab64ca5.sip.cloudonix.net as
your Origination SIP URI.
Click the blue Add button to return to the main screen, which should now look like this:
Now, you can purchase numbers from Twilio and assign them to your Cloudonix voice applications.
BYOC SIP Trunking
Twilio BYOC (Bring Your Own Carrier) allows you to use your existing SIP infrastructure and phone numbers with Twilio's platform while still leveraging Twilio's programmable voice APIs. It enables you to connect your own carrier (or PBX, SBC) to Twilio, providing flexibility and control over your communication.
Logon to your Twilio dashboard, then from the left menu select Voice -> Manage -> BYOC Trunks. Click the Blue plus button to create a new BYOC connection, the following will appear:
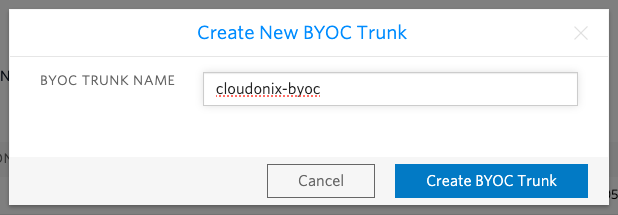
Give your new trunk a meaningful name and click Create BYOC Trunk.
Now, scroll down to the Termination SIP Domains and click the plus button to create a new SIP Termination endpoint.

The following screen will appear:

In the field called Friendly Name insert your Cloudonix inbound calls hostname. In the Termination SIP URI, enter the host part
of your inbound calls hostname. For example, if your inbound calls hostname is: 3d1fed91-9df4-3044-9182-54da6ab64ca5.sip.cloudonix.net
use 3d1fed91-9df4-3044-9182-54da6ab64ca5 as your Terminatin SIP URI for sake of simplicity and completeness.
In the Authentication section, click the plus button to create a new IP Access Control List, the following screen will appear:
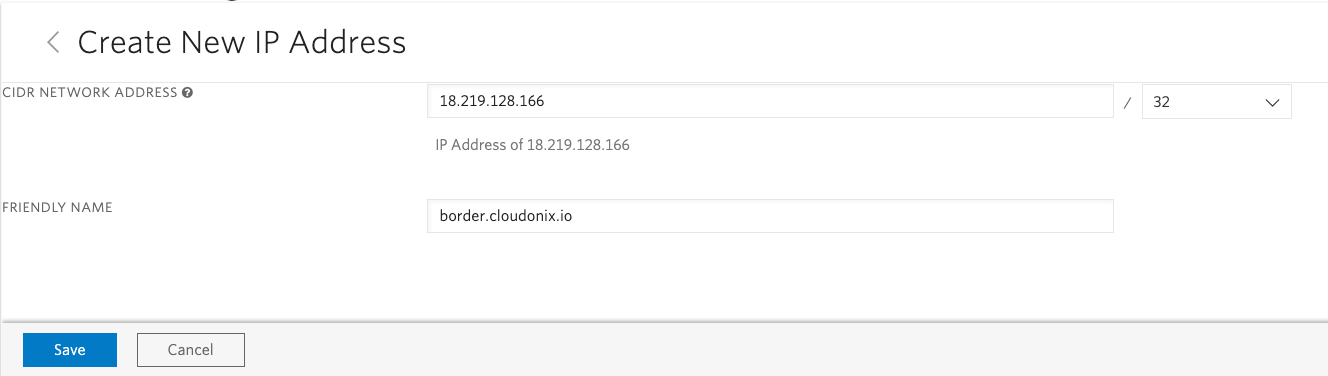
Fill the following information:
| Field Name | Description | Value |
|---|---|---|
| CIDR Network Address | The IP address from which calls will terminate to Twilio's network. | 18.219.128.166 |
| Friendly Name | A friendly name for this authenticaion rule. | border.cloudonix.io |
Click Save and then Save again to return to the main setup page. Scroll down to the Origination Connection Policy section, click the plus button to create a new policy, the following screen will appear:
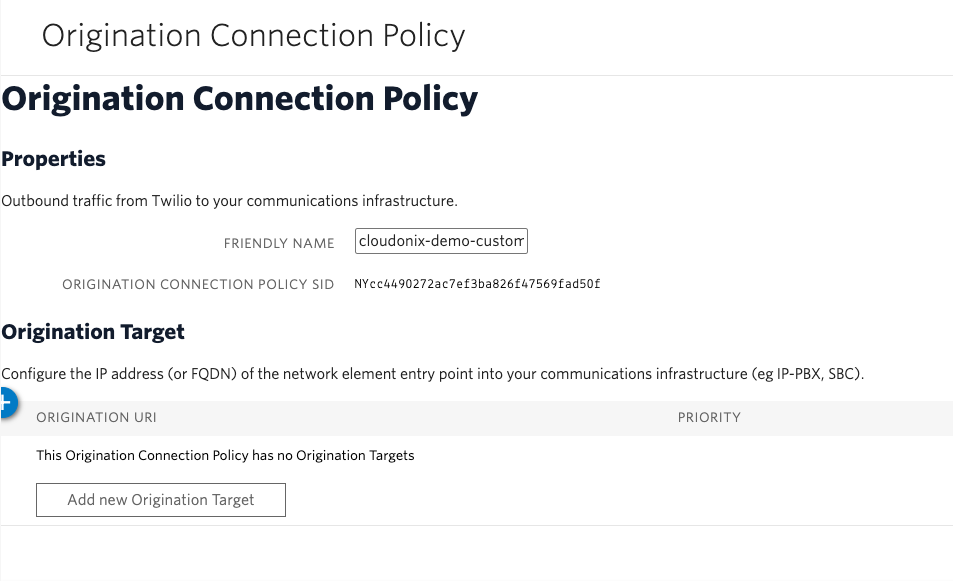
Fill the following information:
| Field Name | Description | Value |
|---|---|---|
| Friendly Name | Use your Cloudonix domain name for easy usage later on. | Eg. cloudonix-demo-customer.cloudonix.net |
Now, click the blue plus button to add a new SIP origination target URI. The following screen will appear:
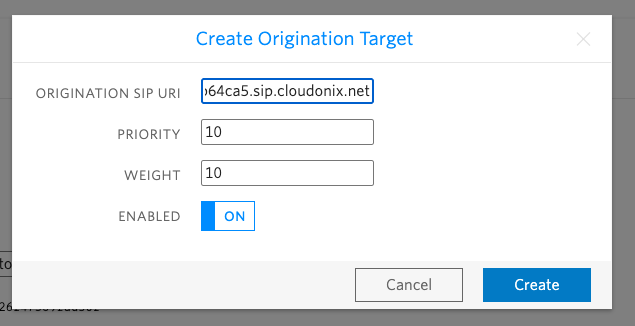
In the Origination SIP URI enter your inbound calls hostname, prefixed with sip:. For example, if your inbound calls
hostname is: 3d1fed91-9df4-3044-9182-54da6ab64ca5.sip.cloudonix.net use sip:3d1fed91-9df4-3044-9182-54da6ab64ca5.sip.cloudonix.net as
your Origination SIP URI.
Click Save and you are ready to go. Your Twilio account and Cloudonix domain are now connected via BYOC and you can process calls properly.
Cloudonix Setup
Inbound Trunk
As Cloudonix inbound configuration for both BYOC Trunk and Elastic SIP Trunk is based upon the Cloudonix inbound calls SIP hostname, no additional configuration is required.
Outbound Trunk
Logon to your Cloudonix account dashboard and select the Outbound Trunks menu option, the following screen will appear:
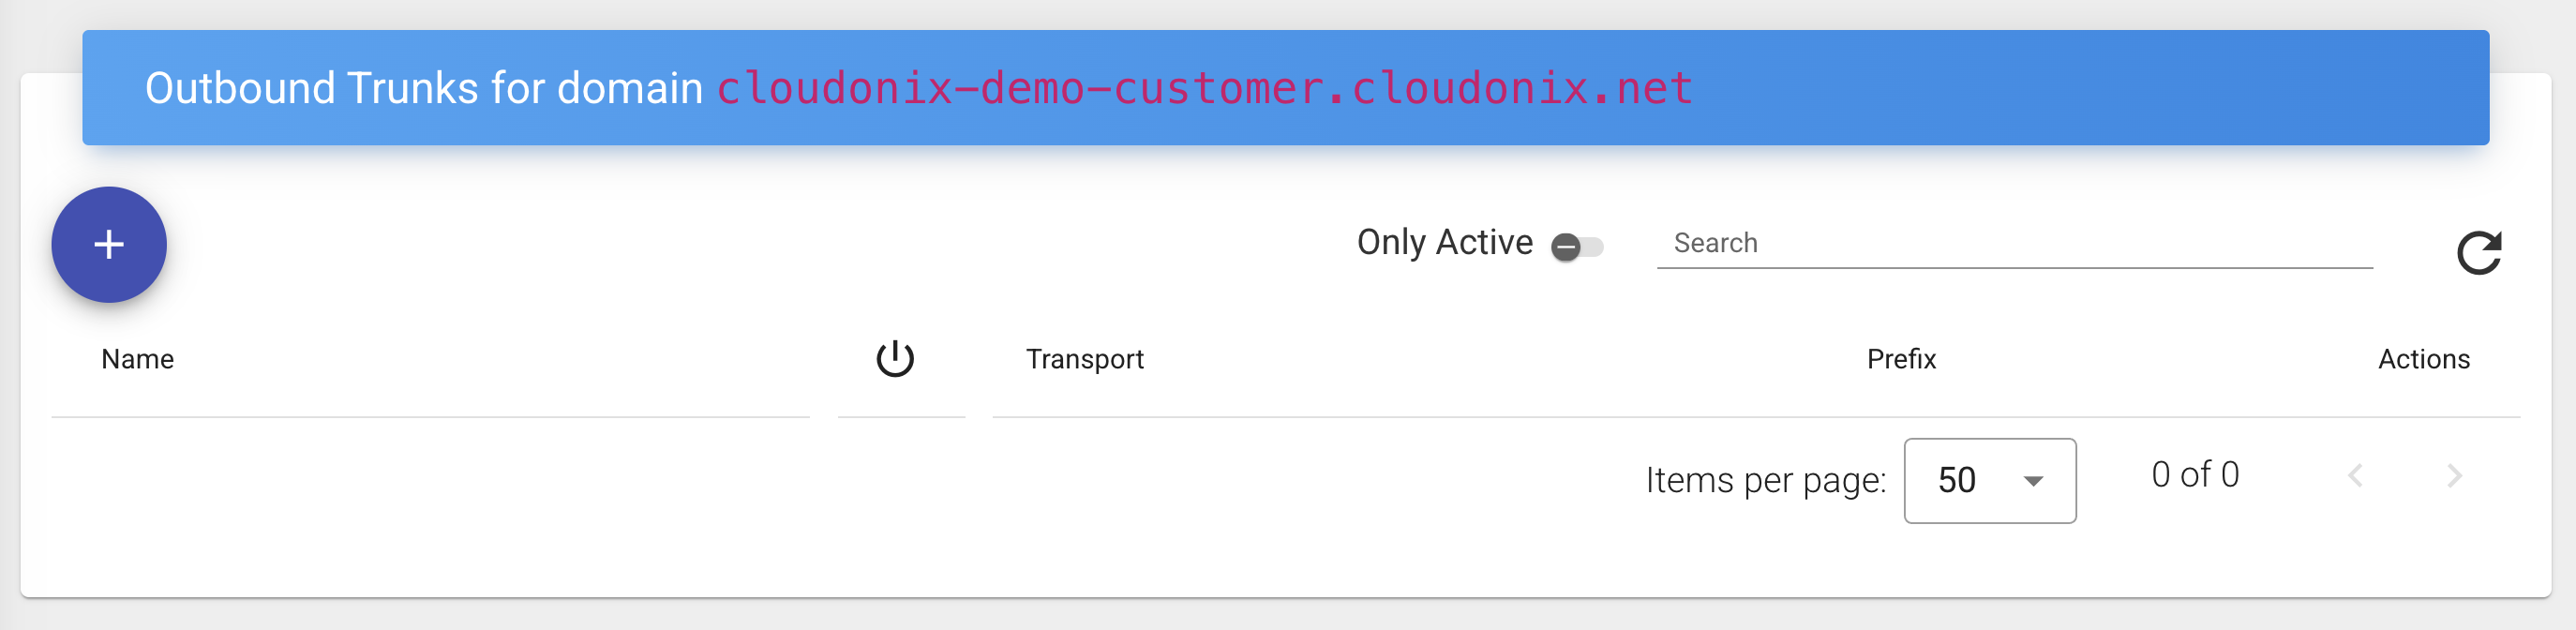
Click the plus button to create a new outbound trunk. In the Trunk name field, enter a description for your connection to Twilio.
For example: twilio-3d1fed91-9df4-3044-9182-54da6ab64ca5

Then, scroll down to the Trunk Configuration section:
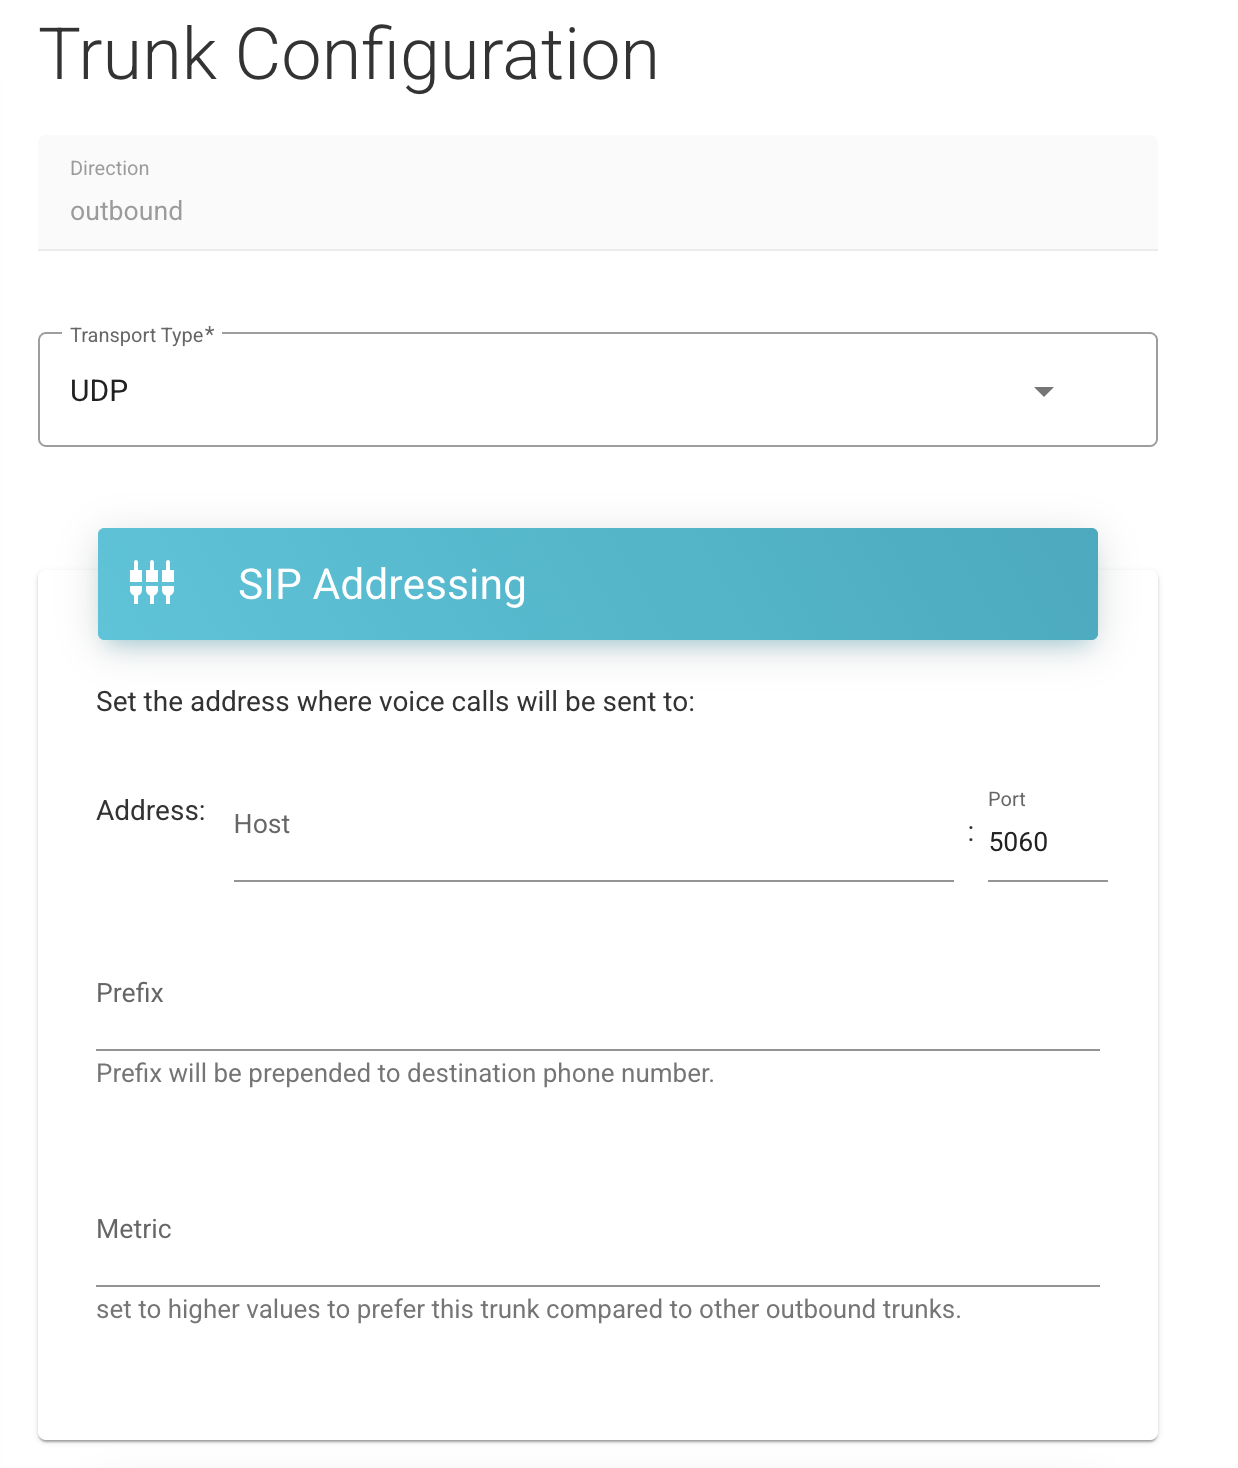
In the Host part, enter the Twilio provided termination address. In our case 3d1fed91-9df4-3044-9182-54da6ab64ca5.sip.twilio.com - then save your configuration.
You are now ready to build your first voice application and connect it to your Twilio provided phone numbers and call services.