Cloudonix Voice AI Connector
Voice Agents use artificial intelligence or machine learning technologies. As you integrate with any 3rd party AI/ML service provider, you must make yourself aware of the services' privacy and security policies. Cloudonix will not be liable for any damages incurred to you or your customers, in relation to the usage of 3rd party AI/ML services via the Cloudonix platform.
As a means of simplifying connectivity with various Voice Agent platforms, Cloudonix provides a command line (CLI) tool,
to make configuration with the various platform easier and faster. The CLI tool, named cx-vcc is based upon node.js
and can easily be installed via the npm repository. To install the tool on your local machine, follow the guide
below, then continue to the next guides, in order to fully configure your connection.
The cx-vcc tool is provided to all as an open-source tool, with its repository available here.
We welcome our community members to raise issues and contribute features and idea to this tool—via the github issues and pull-requests sections.
If you're a service provider and you would like to be included in this tool, please contact us via Discord.
For the impatient
If you are familiar with npm and node - use the cx-vcc package to install the tool. You can use the following link
to view the tool page.
Pre-Requisites
You are required to have node.js version >= 22 and npm version >= 10. In order to verify this, we recommend using nvm for this.
Installing node and npm (optional)
If you currently don't have node and npm installed on your local machine, here is a quick installation guide to get you started using the nvm tool.
Installing nvm
Use the following commands to install the nvm tool on your computer.
$ curl -sL https://raw.githubusercontent.com/nvm-sh/nvm/v0.35.0/install.sh -o install_nvm.sh
$ chmod +x install_nvm.sh
$ ./install_nvm.sh
After the installation completes, open a new terminal window to continue the installation.
Verify nvm
$ command -v nvm
The output should simply say nvm.
Install node and npm
$ nvm install --lts
This will install the latest version of both node and npm.
Verify your installation
To verify your installation, use the following commands to verify your node and npm versions.
$ node -v
v20.12.2

# npm -v
10.9.0
Installation
From source code
Clone the repository
$ git clone https://github.com/greenfieldtech-nirs/cloudonix-voiceai-connector.git
$ cd cloudonix-voiceai-connector
Install dependencies
$ npm install
Link the CLI tool globally
$ npm link
From npm package
npm install -g cx-vcc
Basic CLI Testing
After installation, you can use the cx-vcc command globally. For example:
$ cx-vcc --help

Global Options
The following options can be used with any command:

--debug     Enable debug mode for detailed API request/response logging
--version   Show version number
--help      Show help information
Initial Configuration
Before you can connect the various service providers to Cloudonix, you must first configure your tool. The cx-vcc tool
is designed to support a single account per service provider (one API key per service provider), while maintaining
multiple Cloudonix domains. You will need a unique Cloudonix domain API key for each configured domain. To connect
the tool to your Cloudonix domain, follow the process below.
Create a domain API key
Login to your Cloudonix account, and select the Cloudonix domain you would like to connect a voice AI service provider.
Once selected the API Keys menu option from the left menu, the screen wil change to the following:
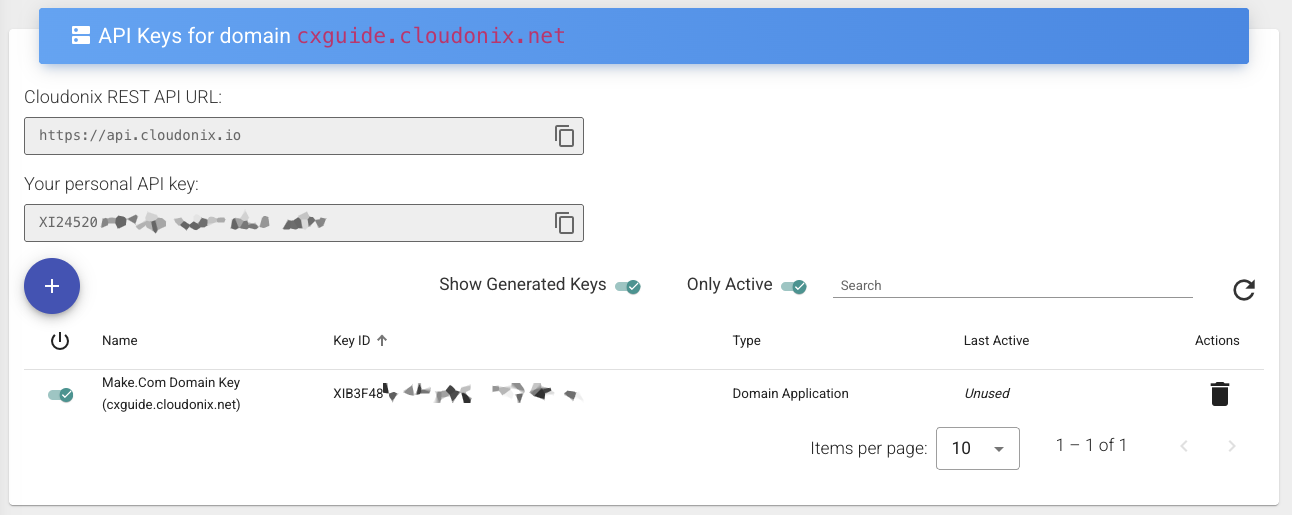
Now, click the button to create a new API key, and give it a meaningful name.
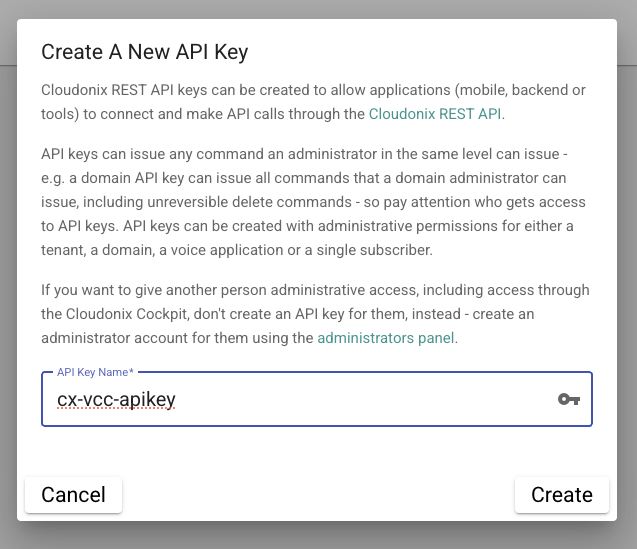
Once the key is created, the following screen will appear:
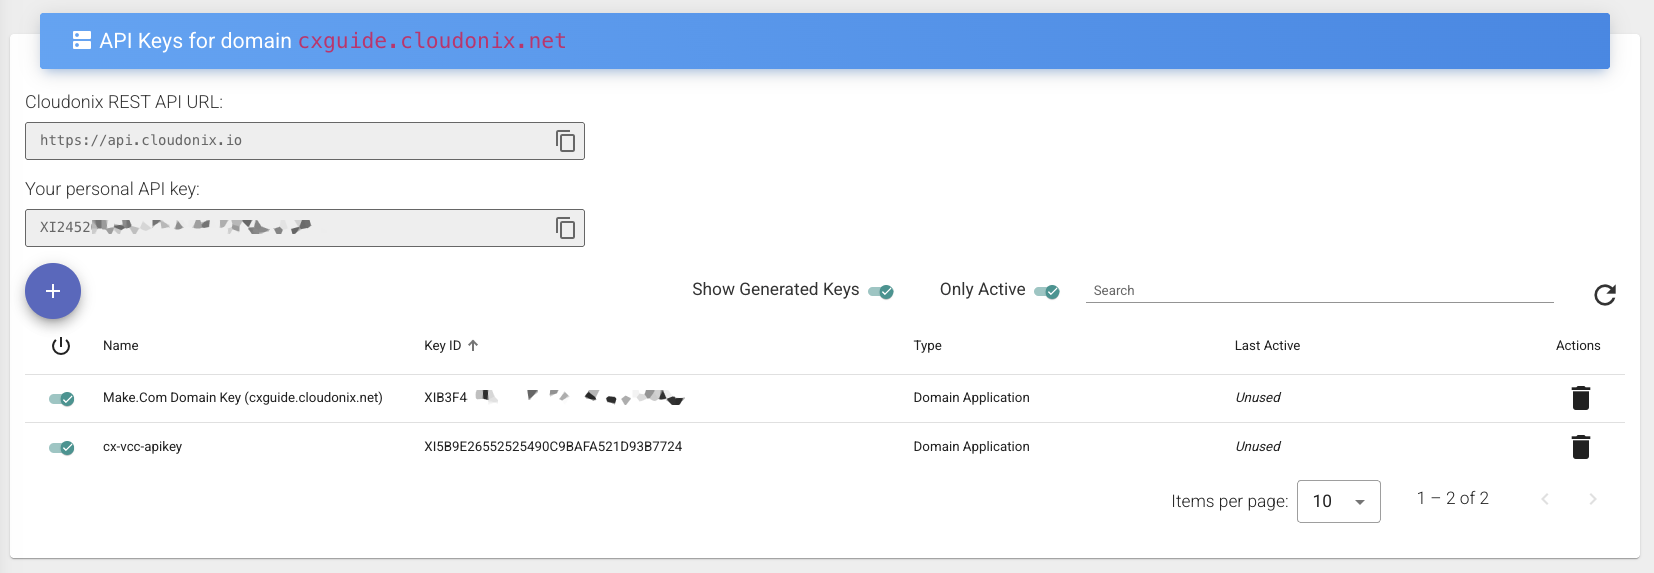
Pay close attention to the API key that was generated, you will need it shortly.
Configure the tool
To configure the tool, we need to declare our Cloudonix domain and API key to it. That is done via the following command:
cx-vcc configure --domain example.com --apikey YOUR_CLOUDONIX_API_KEY
So, based upon our previously created API key, it will look something like this:
cx-vcc configure --domain cxguide.cloudonix.net --apikey XI5B9E26552525490C9BAFA521D93B7724
Which will result in your console like this:
$ cx-vcc configure --domain cxguide.cloudonix.net --apikey XI5B9E26552525490C9BAFA521D93B7724
✔ Domain cxguide.cloudonix.net configured successfully with inbound SIP URI: dd7a2a82-2457-3578-a63b-bd132950c857.sip.cloudonix.net
$
Validate your configuration
At any time, you may validate your tool configuration using the display command:
$ cx-vcc display
All domain configurations:

Domain: cxguide.cloudonix.net
API Key: ********
Alias: dd7a2a82-2457-3578-a63b-bd132950c857
Auto Alias: dd7a2a82-2457-3578-a63b-bd132950c857
Inbound SIP URI: dd7a2a82-2457-3578-a63b-bd132950c857.sip.cloudonix.net
Tenant: self
Phone Numbers: None configured
For those interested to know, the tool stores all configuration in the ~/.cx-vcc/config.yaml file. The above CLI output was generated from the following configuration file:
domains:
  cxguide.cloudonix.net:
    apiKey: XI5B9E26552525490C9BAFA521D93B7724
    alias: dd7a2a82-2457-3578-a63b-bd132950c857
    autoAlias: dd7a2a82-2457-3578-a63b-bd132950c857
    inboundSipUri: dd7a2a82-2457-3578-a63b-bd132950c857.sip.cloudonix.net
    tenant: self
Be advised, the CLI tool doesn't output stored credentials.